Month: September 2019

Outsmart Winter — Make Houseplants of Your Garden Growers

Gardeners in cold climates are knowledgeable about the dreaded feeling that comes with the first frost. The great thing is that the ending of summer doesn’t need to mean saying goodbye to crops that you’ve nurtured. Many fragile perennials, container annuals and tropicals could survive as houseplants until spring. When your plants are in easy-to-move containers, then the occupation is simple. But even plants at the ground could be carefully dug up, potted and brought inside for fall and winter.

The best advice in regards to overwintering would be to plan ahead and bring your outside plants inside before it becomes imperative. Plants given time to adjust to their new surroundings will fare far better indoors than those that are transferred without a forethought.

The rule of thumb would be to bring plants indoors before night temperatures dip below 45 degrees Fahrenheit. Some tropicals should be brought indoors when temperatures dip below 50 degrees, and orchids should be moved inside when temperatures fall to the 55- to 60-degree variety.

ADRIS GROUP

Acclimation into the inside. Because conditions vary widely between the inside and outside your house, a gradual introduction (or reintroduction) into the inside is vital. Sudden changes in temperature, humidity and light may cause irreversible trauma to crops, and in the least may result in yellowing leaves, wilting as well as partial departure.

Plants that have been outdoors in large light should be placed in similar light inside, such as close to a caked window or under fluorescent plant lights on a timer for 16 hours a day. To acclimate sun-loving outside plants into a dimmer indoor place, keep them in a shady place outdoors for a week or 2 prior to moving them inside.

Even with the best care, exterior plants can wither and droop when transferred inside. If some leaves turn yellow or fall off, don’t despair. Trim the dead growth, keep the humidity up levels and set the plants in a bright place, and they might recover once they are knowledgeable about the conditions in their new home.

Sandvold Blanda Architecture + Interiors LLC

Facilitating a dormant period for woody species. Depending on the kinds of crops you’d love to overwinter, and the available area in your residence, you might gain from letting some woody species to go dormant at a sheltered garage, an unheated basement or an outside shed. Roses, hardy hibiscus, lavender, rosemary and shasta daisy are among those plants that could withstand, and also benefit from, a period of dormancy in winter. Maintain the strands from drying out entirely and make sure that the temperature stays approximately between 20 and 40 degrees. Dormant plants do not require fertilizer or light.

Kristen Rivoli Interior Design

Trimming and taking cuttings. When a container plant is becoming leggy over the summer, gently remove it out of its container and then prune the top and roots in equivalent proportions. Scrub the pot to rid of any infestation or parasites. Add fresh bagged potting soil (not garden dirt(which can have ailments), then replant.

That is also a fantastic time to take cuttings of annual flowers, such as impatiens, begonias, geraniums and coleus. They root easily in sand or water, and also make attractive houseplants, which may then be implanted in the garden come spring.

Crisp Architects

Setting the point. Thoroughly clean windows inside and out to allow as much light in as possible. A sunny window ledge, a shelf mounted along with a window or maybe a built-in recessed niche such as the one here could become a stunning flowering backyard all winter long. With the correct requirements, many flowering plants may provide winter blooms indoors. Geraniums, impatiens and begonias are a sure bet. For the adventurous, even Evolvulus and verbena could be overwintered too, though they will require an extremely bright place just like a sunroom or greenhouse.

Here is a quick collection of garden crops that may be overwintered or improved inside, some with greater success than others, but certainly worth a try: Abutilon, angel’s trumpet, begonia, bougainvillea, citrus (like lemons, calmondins and kumquats), coleus, ficus, geranium, hibiscus, impatiens, Mandevilla, passionflower, pentas, lavender, shasta daisy and all succulents.

Pest control. Always remember to inspect crops for infestation and disease, and treat the problem before bringing them inside. If you guess that there could be snails, worms or other insects burrowing in the dirt, soak the pot in a tub of lukewarm water for about 15 minutes, which will force them out. (Do not do so with plants that move semidormant or dormant in the winter, such as succulents and bulbs, because these plants need contaminated soil during their dormant period. Repot any such crops and put a piece of cable screening over the drainage hole to keep out the little critters next year.)

Before bringing plants inside, treat them using a natural parasitic plant spray for many weeks to get rid of little pests (those that you see and those that you don’t). Or you may spray on soap-tolerant plants using a soap solution, which may also be an effective nontoxic insecticide.

Dennison and Dampier Interior Design

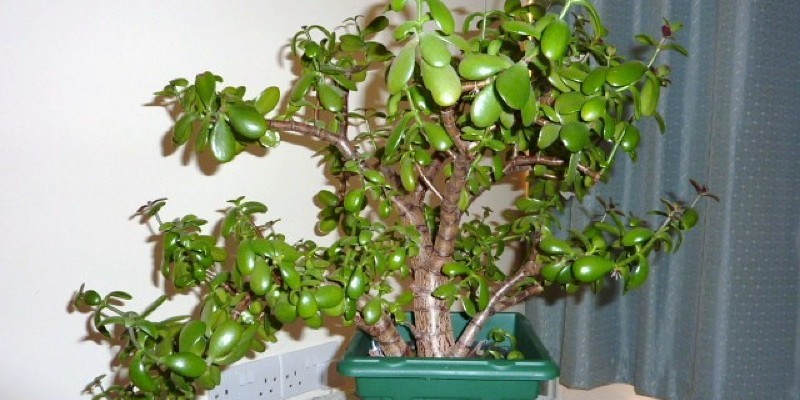
Growing garden types inside year-around. Do not be shocked if a number of your overwintering experiments are so successful that you decide to make a permanent home inside for crops usually seen in the backyard. The collection seen here is magnificent and distinctive in addition to unexpected. Diligent trimming keeps the compact kinds and shows off the crops’ stunning colors.

The 3 chief plants flourishing in this volcano:
The Purple Heart blossom at the corner is particularly easy to grow; disperse it simply by sticking cuttings into dirt. The silver-leaved leaves plant on the table appears to be Dusty Miller (Senecio cineraria); it is a wonderful decorative touch with this rustic, historic-looking room. The blooming bush is Abutilon, which, with proper pruning and repotting twice per year, could be considered a houseplant for many decades. Abutilon prefers a cool winter room and less water, followed by warmth and sufficient moisture in the summer.

Important considerations for overwintering outside plants:

Location: Generally the most effective indoor place for any outdoor backyard plant is close to a sunny window. Do not allow any leaves to get a cold window. Maintain the plants away from drafts in addition to heating vents. Since the dry winter air inside our homes can be damaging to overwintering, a well-lit toilet or laundry area (both humid) could be the ideal location for your plants. The leaves will turn brown and clear if there is not enough moisture in the air.

Timing: Allow plants to gradually acclimate into the very dry effects of indoor heating by bringing them inside before you actually begin heating your house.

Maintenance: Provide extra humidity by misting the leaves each day and consider placing the plant’s container onto a shallow water-filled tray lined with little stones, or so the pot stands around the rocks but not at the water. Throughout the cool seasons, many crops naturally become dormant or develop at a really slow pace. Watering should be performed only when the soil looks dry, but do water the plant deeply enough so that water drains out of the bottom of the pot to the tray or plate. Fertilizer is usually not suggested.

Cautions: Many plants are poisonous as well as riskier for children and animals than adults, so do your homework to determine which crops to stay out of reach if necessary.

See related

How to Know Reverse Mortgages

Reverse mortgages have been touted as a method of turning the equity you’ve got in your home into earnings. Instead of making monthly mortgage payments, you can use the equity you’ve got in your home–the positive difference between the appraised value of your home and the mortgage in your home–to reverse the mortgage and get monthly payments rather. It appears a easy trade at very first sight, but before you take out a reverse mortgage on the home you’ve spent years paying , you should have a comprehensive comprehension of what a reverse mortgage involves.

Determine your eligibility to get a reverse mortgage. A reverse mortgage requires that all the name owners of your home be at least 62 years of age, and also that the home in question is their main residence. Only residential units qualify, with most qualifying homes being traditional single-family homes. Another eligibility requirement is that you talk to a mortgage adviser approved by the U.S. Department of Housing and Urban Development.

Apply to get a reverse mortgage using an FHA lender. Find lenders using the form on the HUD website.

Read the loan arrangement thoroughly. Note the terms of the loan, including the loan amount, payment plan and the rate of interest charged on the loan. Find the section detailing the fees for your loan as well. Lenders deduct the loan fees by the loan payment and charge interest on the fees as well.

Start looking for the section on home ownership inside the contract. This section of the contract describes your obligations regarding home care after completion of the loan process. Ordinarily, you will continue to pay land tax on the home, in addition to insurance and maintenance costs to keep the home in a level determined satisfactory by the FHA.

Pick the length of the loan along with the conditions for repayment. At the end of the loan period, you or your heirs are responsible for repaying the full loan amount including the money received, together with interest. Loan periods are either lien based, without a repayment because until you leave the home eternally; or duration based, where the loan includes a predetermined period of time till it is expected. You might also decide to make a line of credit reverse mortgage, setting a line of credit that you can draw on until you accomplish your loan limit.

Get accustomed to the default states of the loan that lead to a demand for repayment. The loan becomes due immediately if you are not able to keep up with real estate taxes or insurance, then proceed from the residence or fail to keep the home to FHA-mandated standards. Provided that you satisfy all of loan guidelines, you can keep residence in the home even after the term duration of the loan moves, regardless of repayment.

Speak to a mortgage adviser if you have any questions regarding the details of the loan, prior to signing the loan contract. Counseling is offered at a minimal cost or for free, based upon your income level.

See related

Neat Little Project: Construct a All-in-One Storage Seat

When building something for a kids’ area, think about it might be used by them. You and the recipient will find a lot more enjoyment and use out of something that can resist the transitions from one era to another. This multipurpose wooden seat can be used from childhood through the teen years as a small side table, nightstand, small seat and step stool, and as storage.

Chris Hill

This easy-to build piece measures 18 inches long, 91/4 inches deep and 143/4 inches high. It’s slightly shorter than a classic 18-inch-high seat plus somewhat taller than several step stools.

The bottom storage space measures 14 inches long, 73/4 inches wide and two1/2 inches deep. It can hold a variety of items, such as the books and large jar you see.

The top is large enough to hold a small lamp and other things.

Chris Hill

Tools

You’ll need a handsaw, miter saw or circular saw for cutting the parts, a pair of 18-inch or larger clamps plus a hammer.

When you have only a jigsaw, you can make the reductions for this undertaking, but be certain you’ve obtained a secured straightedge to utilize as a guide when doing so.

Materials 1-by-3-by-4 board 1-by-10-by-6 board 4d finish nails (28)For a painted version, use something such as poplar or alder. For a version that is stained, proceed with something such as walnut.

Pick up a box of 4d finish nails if you don’t have enough in your supplies already. It is possible to use #16 by 11/2-if you just happen to get those 18, inch brads.

You’ll also want some wood glue, primer and paint (or stain and polyurethane). And course paintbrushes and rags.

Chris Hill

Create the bottom (rail assembly). Cut 2 pieces of this 1-by-3 to 14 inches long — all these will be the railings. Cut a piece of this 1-by-10 to 14 inches long — this is the bottom. Apply glue to one edge of the railings and position them as shown at Figure 1 so they are flush with the edges of the bottom. Clamp everything in place and hammer four nails or brads through the ground and right into every railing.

Chris Hill

Attach the floor to the sides. Cut two pieces of 1-by-10 to 14 inches long — all these will be the sides. Apply glue to the ends of the bottom and railings, and position the meeting as shown at Figure 2, making certain the bottom is just 11/2 inches from the ends of the sides. Stir everything collectively and hammer five nails or brads through the sides and to the floor.

Chris Hill

Attach the top. Cut one final bit of this 1-by-10 to 18 inches long — this will be the top. Apply glue to the ends of the sides farthest from the bottom and position the top as shown at Figure 3. Clamp everything together and hammer five nails or brads through the top and right into every side.

Chris Hill

Add the finishing touches. Sand the entire piece, particularly any demanding corners and borders. If you are planning to paint it, then apply two coats of primer. Sand between coats after the primer has dried. Apply two coats of paint.

If you’ll be staining the bit rather, apply blot for the desired time, wipe off the excess and allow the piece to dry prior to applying a top coat of polyurethane. You can even mimic a blot with a DIY colour wash.

Gently rub on the very first dry coating of foam with fine-grit sandpaper (220) or steel wool, and wipe off any residue prior to applying any succeeding coats.

More: Browse more DIYs

See related

Get the Appearance of a Constructed Fridge for Less

Counter-depth refrigerators are popular appliances for new kitchens. Their allure is they save precious aisle space by sitting flush with the cabinets rather than sticking out. This makes the kitchen look smooth, custom and visually arranged. These models may also be finished with matching cabinet doors for a much more cohesive look.

The downside is they’re very pricey. They can cost two to three times greater than a normal freestanding fridge, and have to be wider to incorporate exactly the exact same cubic-foot storage. If you’d like this look with no excess cost, design your cabinets and kitchen in order that your regular-size fridge sits flush with your cabinets.

Cameo Kitchens, Inc..

Freestanding refrigerators are available in many shapes and sizes. While typical foundation and tall cabinets are 24 inches deep, freestanding refrigerators may be 30 inches deep or deep, with varying widths too. Therefore, you should select your fridge early in the preparation procedure.

To get that flush look, you may either recess a freestanding unit several inches into a wall or have your cabinets furred out a couple inches to fulfill with the refrigerator.

Inside this kitchen, even if you look carefully, you’ll see that the 24-inch-deep base cabinets that extend into the left are brightly behind the oven cabinets. The appliance portion of this wall, hence, was furred out. Be aware that the side cabinet panel on the right was arranged in a larger size to accommodate the depth of the fridge, which can be more than 24 inches.

Design Details

In this case the fridge door sticks out beyond the bottom cabinets. However, because there are deep side panels and a profound cabinet overhead, the fridge looks integrated into the cabinetry and constructed in. A profound cabinet over the fridge is a good location for tray storage or maybe a TV, as revealed here.

Boor Bridges Architecture

Here is another kitchen where deeper cabinets adapt the larger depth of a freestanding device. This fridge is a bottom-freezer model.

microhouse

Here the homeowners assembled a broader set of deep cabinets, which include some spacious shelves for display.

Buckminster Green LLC

Another method to “build in” your freestanding fridge is to really build it into the wall, rather than cabinets. If your kitchen program will allow it, this is probably the easiest and most cost-effective approach to get the look, since you may create the opening the exact width and depth you need. Additionally you won’t have some cabinet modification costs.

Margeaux Interiors – Margaret Skinner

This is particularly well done. The very linear fridge fits neatly into the opening and can be trimmed out with home molding. The display shelf above draws the eye upward. With a wine refrigerator next to the major refrigerator in a little peninsula cabinet, this is a good area for dispensing beverages.

Kate Marker Interiors

This kitchen utilizes a very productive approach to incorporate a profound fridge: The cabinets have been stepped, for a very custom look. In the corner to the left of the fridge, the cabinets are typical sizes: 12 inches deep on top; 24 inches deep on the bottom. Next comes the upper cabinets and the appliance garage device, probably 15 to 18 inches deep. The deepest cabinet is about the fridge, with display cabinets above.

At the end is a tall spacious cabinet that creates an interesting visual display as you enters the kitchen. Be aware that this cabinet is really pulled back a couple of inches in the fridge depth, so it proceeds the stepped look and also makes that corner a little less intrusive.

Susan Teare, Professional Photographer

Cabinets and a fridge sandwiched in stud walls produce a clean and contemporary look here. The cabinets were likely furred out over the walls.

Rebekah Zaveloff | KitchenLab

This fridge is the centerpiece of an open display area. This would be a very cost-effective method to house a fridge and small appliances while using a brief wall. (This therapy even accommodates a radiator)

More:
4 Essential Space-Planning Considerations

How to Stay Cool About Selecting the Right Refrigerator

See related

Superstar Annuals for Containers and Baskets

I demand a lot of my container crops. I expect them to blossom with very little if any deadheading or to possess fabulous foliage — preferably both. I do not want to pinch them back, prop them up or do a whole lot more than water them frequently (and I do so with an automatic drip irrigation system to keep my hands free for that large, cold drink with a little umbrella in it). I don’t have any tolerance for wimpy crops. Only the best will do, and after personally analyzing each of them I can vouch for their celebrity status in the Pacific Northwest, although a lot of my horticulture colleagues will attest to their visibility from different fields of the United States too.

Have you tried these annuals? Many were new introductions for 2013 but are readily available in nurseries and on the internet.

1. Superbells Lemon Slice

I am not a petunia fan. In my Seattle climate, petunias go mushy with tacky and rain with aphids, and in addition, they have to be deadheaded regularly — way too much work for me.

Superbells Lemon Slice may look just like a miniature petunia, but thankfully that’s where the comparison ends. This new Calibrachoa hybrid is unfazed by summer rain and heat, and it blooms so prolifically that the foliage is hardly observable.

The dense, mounding habit means it hugs the sides of containers or baskets well, while trailing two feet approximately. This tidy habit makes it an 11 out of 10 from me.

Botanical name: Calibrachoa hybrid
Water requirement: Average
moderate requirement: Full sun

Le jardinet

Design thoughts: The multihued Luscious Berry Blend lantana displayed here is a perfect color partner, repeating the yellow while presenting hot pink and zesty orange. This lantana is vigorous enough to contend with Superbells too.

Lemon Slice would also make a vivid colorful ruffle beneath an arching purple fountain grass (Pennisetum setaceum ‘Rubrum’).

Le jardinet

2. Spitfire Coleus

There are hundreds of coleus hybrids. While all are colorful, some are spindly others need endless pinching back to keep the plants compact and a few assert they can take complete sun but actually can’t.

Spitfire is different. I analyzed it in harsh circumstances in 2012, and it came with style. Despite intense summer sun, it didn’t show any signs of scorching. It never wilted from the heat and even remained compact without pinching. The bronze foliage turns more cherry in full sunlight and can be accented with lotion.

Botanical name: Solenostemon scutellarioides
Water requirement: Average
Light requirement: Full sun

Le jardinet

Design thoughts: Emphasize the paler colors within Spitfire by mixing it with Orange King coleus (pictured here). The leaves of the 2 coleuses may differ in size and pattern, but their shared color palette creates a sense of unity.

I also planted Spitfire with Luscious Piña Colada lantana, which has a soft creamy yellow flower. This was shown to be a beautiful, fresh-looking combination.

Le jardinet

3. Bonfire Begonia

This sun-tolerant begonia is so dependable that I buy a dozen at a time once I see it look in nurseries. I use these tracking annuals in hanging baskets or at the advantages of containers, in which they not only tolerate full sun but thrive inside. Bonfire begonia is revealed here with Angelina sedum (Sedum rupestre ‘Angelina’).

The orange flowers, often mistaken for fuchsias are a hummingbird favorite, and I often find myself being heckled by these feisty little birds while I’m attempting to complete my planting.

No deadheading is required to maintain this beauty blooming. Just be careful not to overwater, but settle back and appreciate.

Botanical name: Begonia boliviensis hybrid
Water requirement: Average
moderate requirement: Full sun or partial shade

Le jardinet

Design thoughts: Permit Bonfire to ship out dozens of orange sparks out of a densely planted container.

This picture indicates the Arakawa Japanese walnut (Acer palmatum ‘Arakawa’)underplanted with deep red coleus, chartreuse and bronze sweet potato vine (Ipomoea batatas), and Bonfire begonia. It also pairs well with purple or blue flowers and foliage, like the fanflower described next.

4. Whirlwind Blue Fanflower

This is one for the front of the pot. It is called a spiller, since it paths loosely, yet it ends flowering branches at a multitude of directions — making for some great, if unexpected, mixes. As opposed to making it look untidy, this feature is actually one of those I love most about fanflower; it is a filler plus a spiller all in one.

The pretty periwinkle-blue fan-shaped flowers cover this unassuming annual until a hard frost. It is really an outstanding performer.

Botanical name: Scaevola hybrid
Water requirement: Average
moderate requirement: Full sun to partial shade

Design thoughts: Plant a hanging basket exclusively with fanflower.

For more colour add the bold orange Bonfire begonia and trailing sweet potato vine — the black foliage of Blackie (Ipomoea batatas ‘Blackie’) would be dramatic.

Le jardinet

Or let fanflower to mingle with additional container crops, like this Superbells Apricot Punch. For foliage interest I’d add in one of those deep burgundy floor cover succulents like sedum ‘Blaze of Fulda’ (Sedum spurium ‘Fuldaglut’). The dark red rosettes would play off the similarly coloured neck of theSuperbells.

5. Beefsteak Plant

At first glance this looks like a coleus, yet it is sturdier than coleus and appears to be slug resistant. This leaves plant requires no return to look fabulous all season. It is going to typically reach two feet tall and one foot wide, making it convenient as a thriller in small pots or a filler in bigger ones.

I have used beefsteak plant just in a shade container, but I feel the coloring is much more intense in sunlight.

Botanical name: Perilla frutescens ‘Magilla’
Water requirement: Average to non
Light requirement: Partial shade to full sunlight

Le jardinet

Design thoughts: Utilize the bold dash of magenta as a springboard to your colour scheme. This foliage-focused container design has it paired with a white caladium (Caladium bicolor) that has striking pink veins and the leathery black leaves of a Calathea. This Calathea cultivar, ‘Dottie’, has an interesting pink stripe around the perimeter, which also plays into the theme perfectly.

6. Diamond Frost

This frothy white blooming annual is not nearly as delicate as it appears. It is demonstrated to be heat tolerant and drought tolerant, it’s a well mounded habit, and it does not require deadheading, therefore this pretty annual is firmly on my favorites list.

Expect Diamond Frost to grow to 12 inches tall and up to 18 inches across. It could be set in the middle or at the border of a container, in which it will mound daintily over the border.

Botanical name: Euphorbia graminea
Water requirement: Average to non
Light requirement: Full sun

Design thoughts: Plant some pretty party favors with white impatiens and Diamond Frost in vibrant tabletop pots. Use these as place settings or set a trio onto a table to decorate a buffet.

Notice: in view of the fungal disease affecting impatiens in many regions of the United States, you may prefer to use this disease-resistant New Guinea impatiens.

More: The Key Formula for Grouping Plants at a Pot

See related

Newly Open Style Updates That a Contemporary Atlanta Home

Town to town, up and down the dial … Janice and Greg Raab’s professions in radio meant a lot of moves — 14 homes in all as 1983, including in Pittsburgh, Detroit, Chicago, Dallas, San Francisco and Atlanta. The couple has adopted these relocation chances and fallen in love by taking on the challenges of fixer-uppers. Both have the keen eye to see beyond bad cosmetics to a home’s possible, and they do as much of the job as they can themselves.

And here’s a novelty: They prefer to cover as they proceed. Yes, all these are patient folks who save up for each home endeavor without going into debt. After residing in a traditional home in San Francisco, they fell in love with this modern 1980s home in Atlanta and worked on living room by room as money and time allowed for seven years. The kitchen was Janice’s favorite renovation narrative, so we’ll concentrate on that.

at a Glance
Who resides: Janice and Greg Raab
Location: Atlanta
Size: 5,000 square feet; 5 bedrooms, 3 1/2 bathrooms

The home comes with a natural style, with fieldstone, wood and a palette of grays, browns and tans infusing it with a warm look. That aesthetic was kept by the Raabs throughout the renovations in your mind.

The few balanced saving initial attributes and removing those that weren’t working. The fieldstone fireplace, cedar ceiling and black tile floor are first.

“When we moved, the black tile covered the whole first floor and made things really dim,” Janice Raab states. “We thought really hard about how much of it save and how much of it replace with bamboo floors, which lightens up the space”

Raab is also huge fan of George Nelson pendant lighting, and she was thrilled that they worked well with the scale and style of the house. She put a number of them put throughout the first floor.

Before Photo

BEFORE: The first kitchen was outdated, dark and cramped, and it wasn’t a welcoming hangout. The couple commissioned their dear friend, Reed Ericson of Studio R Squared, for design help.

“It had been fantastic to use such a good friend, because we could take as long as we desired and fully change our minds about things, and he just rolled with it,” Raab says.

AFTER: walnut floors, travertine backsplash tiles, amber pendant lighting and an onyx waterfall countertop add organic warmth to the modern, clean-lined kitchen. The cabinet grain runs.

The Raabs balanced splurges and savings throughout the renovation. For example, they splurged on onyx and LEM Piston pub stools, and saved by using an induction scope that did not need an expensive gas line.

They weren’t content with the way the slender hardware seemed with the refrigerator’s heft, thus a helpful oven installer finagled two extra oven handles out of GE to utilize for the fridge, which were a far better match.

Stools: LEM Piston Bar Stools, Design Within Reach; pendant lighting: LBL Cypree Pendant; countertops: walnut, Silestone; cabinets: custom, walnut with wenge stain, Cabico; all appliances: GE Monogram

Sink: Kohler Stage Sink with Integrated Cutting Board and Prep Bowls

A pub replaced an awkward old media desk off the kitchen. The few saved a portion of the house’s original dark tiles, offering a connection between the kitchen and the dining room.

This dining room inside the large, open living room is right off the kitchen. The waterfall counter around the buffet/bookshelf emulates the waterfall at the kitchen. It is crafted of the same cabinet oak using all the wenge stain and onyx counter tops.

The pair travels light, plus they prefer to groom their homes to match varied fashions. The burled ash dining table is one piece that the couple has taken with them over the years from house to house (along with Greg’s beloved vinyl collection — beyond that, there are not many exceptions).

Pendant light: George Nelson Ball Lamp, Design Within Reach; buffet: custom using Cabico cabinets, oak with wenge stain

Studio R Squared designed each the cabinetry, including this huge unit that divides the staircase connecting the dining room and living room.

The inspiration for the massive cabinet came out of a Modern Atlanta home tour. “I had seen a piece like this place on staircase throughout the tour a few years ago and snapped a photo of it,” Raab says.

Just beyond the dining room is the top deck, finish with an option for dining outside. This really is a wrought deck that extends across the whole back of the house. The decks are very private; throughout the seasons once the leaves are filled in, there’s not another house in sight.

One of the first things that the couple did was add fresh stainless steel cable railings on the two decks and the front walkway.

Raab scored the outdoor furniture through Craigslist. The initial set cost approximately $1,200 retail, however she bought all these pieces for $600.

Because of career changes, the couple needed to leave their labor of love only after finishing it, and are not certain of where they’ll land next. While they are unhappy to leave, they look forward to finding another diamond in the rough and slowly but surely bringing it up to its entire potential.

More: See the rest of this Home

See related

A Montreal Townhouse Profits Graphic Appeal

Four decades back, when interior designer Rebecca Mitchell’s business was picking up and she could not keep up with her cottage house on a large lot, she decided to proceed with her two kids to a more straightforward, easy-to-manage townhouse. Even though the space is 200 square feet smaller than her previous house, the vaulted ceilings and vertical split-level open layout make it feel even larger.

Mitchell’s busy design provider puts her facing bright colors and chaotic patterns daily, therefore she decorated her space using a fuss-free black and white color scheme and simple patterns to make a relaxing vibe. Another key to making her soothing refuge was redoing the olive-walled and yellow-tiled kitchen using a clean and crisp modern style; this space quickly became the family’s favorite spot in the house.

at a Glance
Who lives here:
Rebecca Mitchell, son Sam (age 16), daughter Emma (12) and kitty Chloe
Location: West Island area of Montreal
Size: 1,400square feet; 3 bedrooms, two baths

Esther Hershcovich

Mitchell’s playfulness with simple patterns and neutral colors — using just a drop of yellow — adds drama into the family’s living room. The pine torso from Saguenay was her first antique order; the snowy Wedgwood vase is a heirloom from her grandma.

Esther Hershcovich

Esther Hershcovich

Framed photographs from her family’s time living in England hang over a Bauhaus-style sofa. “I love to have all of the memories of our own lives encompassing us,” she says.

A brick wall over the fireplace extends into the cathedral ceilings. Previous owners had upgraded the mantel and marble base. Mitchell enjoys this is a focal point of the house.

Esther Hershcovich

White paint and new hardware refreshed this pine chiffonier.

Esther Hershcovich

A slim window brings light into a dining room.

Esther Hershcovich

Mitchell uses a second entry for a mudroom, which is particularly helpful in the Canadian winters.

She found these chairs in an alleyway prior to preparing to host a large family dinner for which she needed more seating. She painted and reupholstered the seats.

Esther Hershcovich

Symmetrically arranged family photographs adorn a foyer wall. Mitchell spent about $20 Canadian (about U.S.$19) about the frames to complete the budget-friendly installation.

Esther Hershcovich

The tables and chairs in the dining area are from Mad Dogs & Englishmen in England. Mitchell painted the black lamp, which used to be pink. It joins other significant things on the buffet, including a painting by a literary performer.

Bar stools: Pier 1 Imports; buffet: Winners

Esther Hershcovich

Vintage photographs printed on maps hang nearby.

Before Photo

Esther Hershcovich

BEFORE: When Mitchell purchased the house, she removed the cupboard doors and backs in the kitchen to make an open shelving unit between both rooms. But this wasn’t enough. Throughout the recent kitchen renovation, she removed the chimney completely to make more open space.

Esther Hershcovich

AFTER: Drama defines the new kitchen. Mitchell saved money by visiting 3/4-inch-thick quartz countertops rather than the standard 1 1/4 inch. She then splurged on glitzy hardware for those cabinets along with a higher-end faucet.

The backsplash is made from oversize black subway tiles with beveled edges.

Contractor: Gary Sharkey, GKS; backsplash tiles: Importations D’Amico; granite countertops, sink: Stone Co.; hardware: Zone; ceiling fixture: Union Lighting; faucet: Plomberium Pierrefonds; fabric: Shorts Fabric Centre; draperies: custom, Ian Maxwell; cabinets: Ikea

Before Photo

Esther Hershcovich

BEFORE: Mitchell refers to the kitchen design as cottage-y, with olive partitions, fake hardwood laminate flooring and yellow ceramic counters.

Esther Hershcovich

AFTER: “I love that it’s a bit of glamour and works well with the rest of the house,” she says.

Floors: Importation D’Amico

Esther Hershcovich

In Britain it’s common to have the laundry area off the kitchen. Mitchell brought this concept residence. Bifold doors painted the exact same color as the kitchen cabinets hide the washer-dryer units.

Esther Hershcovich

Mitchell gave her daughter carte blanche to decorate her bedroom, which now has posters of her favorite group, 1 Direction.

Esther Hershcovich

Mitchell created the headboard in her bedroom and purchased both side tables at a garage sale for $20 Canadian (about U.S.$19) each.

Esther Hershcovich

Previous owners had transformed two bedrooms into a single, divided by a partition wall. 1 side is currently a home office.

Esther Hershcovich

Mitchell had intended to turn the basement into a family room, but instead let her son have it as a man cave.

Esther Hershcovich

From left, Emma, Rebecca and Sam split for tea into their favorite spot in the house: on the bar stools facing the kitchen.

See more photographs of this home

See related

Go for the Glow: Mother-of-Pearl Shines Around the House

Mother-of-pearl was utilized since ancient times to produce individuals and their homes more beautiful, but today’s production techniques have produced this product even more accessible and economical. “Mother-of-pearl” is the frequent name for iridescent nacre, a mix of minerals secreted by oysters and other mollusks and hauled inside their shells; it coatings and protects them from parasites and foreign items.

Now we can utilize this superb material in our homes in a vast range of products. Mother-of-pearl tiles, background and countertops can adorn a space with the same elegance that a pearl necklace adds into an ensemble. It’s not cheap (mother-of-pearl tile starts at about $30 a square foot), but it may be exactly the splurge you want to set your project apart from the crowd.

www.hughesdesines.com

Mosaic tile. Available in a vast range of organic colors, mother-of-pearl tile and mosaic blends are produced from the nacre on shells such as capiz, black lip, brown lip, paua and violet oyster.

White mother-of-pearl appears iridescent obviously, but it may be artifically tinted to any (sometimes shocking) colour.

Rina Magen

This is a gorgeous instance of mother-of-pearl on a kitchen backsplash. This casing tile is often thin, unless it is mounted into a thicker substrate, so if it’s combined with another tile, then it’ll have to be built up to look flush.

If you’re not sold on a casing product but love the iridescent appearance, start looking for manufacturers that make iridescent glass mosaics. White iridescent glass may look quite like mother-of-pearl tiles.

Europa Stone

Flooring. What a elegant mix of natural stone and mother-of-pearl! This program is a great example of layering textures within an white-on-white program. Notice how the simple act of producing a border around a well-proportioned floor tile reinforces the grid layout.

Mother-of-pearl may be used for walls, floor surfaces (make sure that you check with the maker) and sometimes outdoor applications.

Melissa Lenox Design

Accents. If you’re craving the glow but do not have the budget for a full iridescent wall, utilize mother-of-pearl mosaic tile to add a bit of sparkle to an accent. Mirror frames, side tables and table lamps may all shine with mother-of-pearl tile.

Jalan Jalan Collection

Inlay. Mother of pearl is a very suitable product to be cut into shapes. The cut shapes, known as tesserae, are often used as inlay on furniture and other decorative home accessories.

Julie Mifsud Interior Design

Sinks. Shown here as a semivessel version, a mother-of-pearl mosaic sink, such as those from LinkaSink, may be cleaned with mild household cleaner or soap and water. The grout can be cleaned using grout cleaner; it should be sealed a couple of times a year for maintenance.

Lisa Silverman/ Decorator Guru

Furnishings. Mother-of-pearl cabinetry faces use shell panels, rather than tile. These panels are laminated shell tiles also come in many different shell types, colours and dimensions.

Nusa Furniture

Penida

Nusa Furniture often uses mother-of-pearl in combination with coconut on its own furniture. The dark chocolate of the coarse textured coconut and mother-of-pearl’s creamy iridescence make for a delicious mix on this storage cupboard!

Kendall Wilkinson Design

Wall caps. Maya Romanoff, that specializes in luxurious wall products, supplies a flexible tile that may be implemented like a background. The tile is a lean capiz shell veneer used to backing paper using a topcoat for simple maintenance. York Wallcoverings and Franco Ferrucci offer similar products.

Maya Romanoff’s wallpaper starts at $45 per square foot (plus setup). Candice Olson’s mother-of-pearl wallpaper starts at about $110 per double roll (about 60 feet of background).

IceStone

IceStone Palette

Countertops. Icestone uses mother-of-pearl as one ingredient in its own counter products. A cementitious base product mixed with recycled glass shards and mother-of-pearl creates beautiful color combinations.

Mother-of-pearl accents bring a great glow to Icestone countertops, enlivening a space in a calm way. Using little pieces of glass doesn’t feel as competitive as in some other products.

From personal experience, I suggest using Icestone just in areas where there’s no danger of staining the surface. I have used Icestone in laundry areas and baths.

Icestone countertops are similar to mid- to high-end granite in price. Permit for about $150 per square foot (including setup) into your budget.

See related

A Chicago Automobile Shop Revs As Much as Some Cool Home

An automobile mechanic built in 1905 does not seem like something which may anchor a bright and fun home. But designer Nicholas Moriarty tapped into the reinforced concrete floors, thick brick walls and 16-foot ceilings to make an industrial area that is filled with comfy color. “It was hard adding in a great deal of character without making the room feel like a scene in Willy Wonka,” Moriarty says. “By that I mean we wanted the room to feel sophisticated and refined, but playful.”

in a Glance
Who lives here:
An early-30s guy in finance
Location: Wicker Park area of Chicago
Size: 2,000 square feet using a 600-square-foot terrace; two bedrooms, two1/2 bathrooms

Cynthia Lynn Photography

Clean lines run through the open-floor layout. “The loft had good bones, but it lacked character,” says Moriarty. “The overall goal was for each piece to create a statement yet still work harmoniously with everything else in the area.”

Pendant: Le Soleil Suspension

Cynthia Lynn Photography

After the homeowner isn’t working at his finance job, he spends all his time working at a music studio. Moriarty embraced his client’s love of music by drawing on inspiration from the British alt-rock and punk rock era. He then added thickness, colour and texture with eye-catching art.

“To balance, I looked toward traditional British tailoring and made certain every bit we placed at the house was well considered and perfectly proportioned,” he says.

Sofa: Brooks Sectional; chairs: Zinc Chair, Room & Board; ottoman: custom design by Michael Richman; ottoman seat: custom design by Bladon Conner

Cynthia Lynn Photography

In winter the homeowner feels comfortable in his living room. Large windows that face west and north allow lots of natural light into the space, a huge help during lengthy Chicago winters.

Pillows: Maharam, Design Within Reach

Cynthia Lynn Photography

Chairs: Dub Dining Chair by Florense, upholstery: Paul Smith for Maharam, Bespoke Stripe in charcoal; dining table: solid walnut, tradition,Bladon Conner Design and NM Interiors

Cynthia Lynn Photography

“Bubbles,” an art piece by Polish artist Krzysztof Wladyka, hangs above a credenza at the dining room. Moriarty sourced the photos in Castell Photographic Gallery in Asheville, North Carolina, and had them custom framed by Wall to Wall Framing.

Credenza: Square sideboard by Florense, Arctic Gray Oak; table lighting: Steven Haulenbeek; sculpture: Richard X. Zawitz

Cynthia Lynn Photography

With a desire to go big with colours, Moriarty bought this wall installation from Chicago artist Connie Noyes. The picture piece spans the entire wall near the entry of this unit.

Cynthia Lynn Photography

In another foyer, Moriarty comprised multiple bits from Chicago’s Las Manos Gallery. The double art pieces, titled “Plate Etchings” by Mark Pease, are laser-cut etchings and aquatint on paper.

Ceramic sculpture (bottom corner): “Metropolis #4” by Mieke Zuiderweg; photographic transfer on salvaged wood: “Brooklyn Bridge” by Bladon Conner

Cynthia Lynn Photography

Moriarty worked with longtime friend Bladon Conner to make this custom seat near the foyer. It’s made from brushed steel and upholstered with a picture fabric designed by Sarah Morris.

Fabric: The Business Unique, Maharam; background: Belgrade at Glacier, Innovations

Cynthia Lynn Photography

Moriarty framed 18 records and hung them on a wall that leads to a guest bedroom.

Cynthia Lynn Photography

The guest bedroom also serves as an office and a music studio.

Shelves: Volani from Bo Concept

Cynthia Lynn Photography

Bryan Morrison out of Nest Construction set up a space-saving Murphy wall bed and habit cupboard. The customized configuration was made by Jesse Furniture at Chicago for the sofa.

Rug: custom design by NM Interiors

Cynthia Lynn Photography

After the automobile repair shop was converted into condos in 2007, a second-floor main bedroom was added to this unit. The distance is also attached to some wraparound outdoor terrace.

Simple roller shades and custom oatmeal-colored curtains help diffuse the ample light which floods into the area.

Bed: Abbyson Living Hamptons, Overstock.com; nightstands: Abbyson Living Hamptons, Overstock; curtains: The Shade Store

Cynthia Lynn Photography

Sofa: Jane Bi-Sectional, Gus Modern; ottomans: reupholstered at Reverberating Stripes by Paul Smith, Maharam; rug: West Elm; flooring lamp: Big Dipper Arc, CB2

Cynthia Lynn Photography

The main bedroom has a split layout that contains a seating area. The next floor is wired for multizone (indoor and outdoor) music, because of the help of Tom Burns of all Hookup Solutions.

The homeowner and Chicago native appreciates his Wicker Park area for its nature and young, entrepreneurial, free-spirited vibe. Residing in Chicago that the vast majority of his lifetime, he welcomes the diversity, culture and quality of life, including summers at Lake Michigan.

Rocking chair: GT Rocking Chair, Gus Modern; art by homeowner

Your turn: Show us your trendy converted residence!

See related