Category: Eclectic Homes

Carport into Garage Conversion

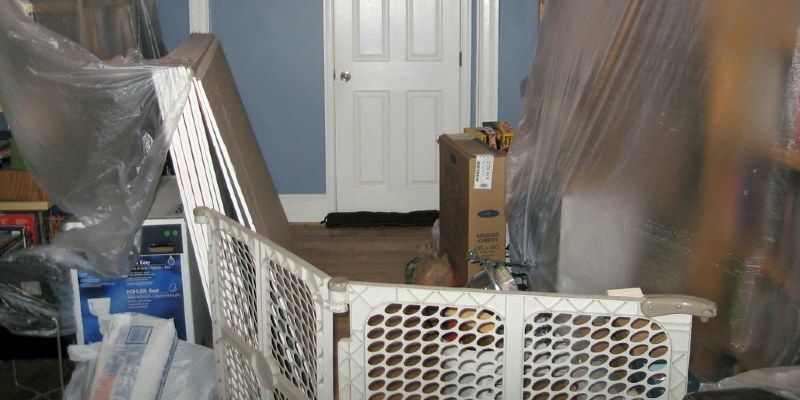
Converting an open back seat can provide a safe place to store gear protection for your car or truck and gear and a place to operate in almost any weather. Although putting up a few walls round the carport frame might seem to be a undertaking, planning and preparation are needed to make sure that the job meets legal and safety requirements.

Rules and Regulations

Most cities and towns require a permit or legal authorization before you can begin building. Requirements and the cost for a permit are set by your government, so check with your city, county or town office for details. You likely will need to submit a set of costs and building plans. If you live in a place that has a homeowners association, check before acquiring a permit or beginning building. But others let them only, some institutions won’t permit carport conversions. You might be forced to pay fines and also remove the garage and restore it to a carport at your own expense if you do not get the appropriate permits from your local government or consent from the homeowners association.

Cost Factors

If converting the carport to a totally enclosed garage entices future buyers also adds value to your home, you’re unlikely to recoup your investment. According to Bloomberg News, you’ll make back just about 57 percent of your investment in a garage when you market your residence. The cost to construct a garage as of the time of book is $35 to $45 per square foot. It’s possible to control costs by choosing substances that are less expensive or by doing yourself.

Suitable Planning

Building strategies can help you decide the amount of materials and the positioning of electric outlets and windows, doors, lights, vents you’ll need. They will be your guide through each step of building. When creating the plan, whether you’re working with a contractor or doing the job yourself, consider all the potential uses for the garage. In case you have a hobby that may require some distance in the garage, think about the best positioning for cabinets, racks and work benches to light electrical outlets and parking space. On the outside, choose materials that fit your home to make it blend in and look like part of the structure.

Safety First

Whether you think about the garage a liveable space, it is an enclosed space. That means safety features should be part of their building strategies, and they may be required. Include appropriate ventilation to prevent noxious fumes and make sure that any openings to the home that is adjoining are properly sealed to maintain fumes from seeping into the home. Windows and doors should meet with fire standards, and fire resistant and some other door has to be sealed properly.

See related

How to Lay a Ceramic Tile Cove Base

A ceramic tile cove base is a tile that looks like a baseboard with a deeply arched or curved base border. You can use a cove tile for a transition from wall into the counter and out of the base of a kitchen backsplash to floor. Not all tile types arrive with a cove base tile available. Tiles which are widely sold will often have companion pieces available.

Measure the height of your tile. Insert your grout line’s depth. Measure above bathtub the floor or counter surface and mark in your dimension. Snap a chalk line that is horizontal to utilize as a manual for the top of your tiles.

Latex tile adhesive into the wall using a trowel. Apply a coating of adhesive to the back of the tile if this measure is recommended by your adhesive manufacturer. Press the tile into the wall. Twist the tile slightly. The cap of the tile must align with the chalk line that is horizontal. Avoid over-applying mastic so it runs between the tile and the floor’s base ; scrape it out with a craft stick if necessary.

Place a level along the top of these tiles to check that the tile is flat and straight. Keep on tiling. When you get to barrier or a corner, cut the tile using a saw. Measure the distance into the barrier from the last tile and mark the back of the tile. Place the tile face side down on the saw. Twist the blade with the mark and move the tile tray under and beyond the blade. Attempt to place your cuts or in regions which are not highly visible.

Permit the adhesive to dry for 24 hours. By injecting the powder to your 9, mix grout. Pour a little bit of water to the powder and stir fry. Continue adding water and stirring until the grout is moist but not runny. Permit the grout to rest for five minutes. This permits the water to consume more fully.

Use the grout within the grout lines float. Don’t allow grout to flow between the base of the cove and the floor. Clean within 15 minutes with a grout water. Permit the grout to dry for 24 to 48 hours.

Fill out the gap between the flooring, tub or counter top with a bathroom caulk that is mildew-resistant and the base of the tiles. Unlike grout, caulk will not crack in cases of minor movement of counter the floor or bathtub.

See related

The Way to Insulate a Concrete Wall

While concrete supplies a high amount of strength and durability, it offers hardly any natural insulation for the home. Adding insulation to your concrete walls enhances your home’s energy efficiency, which often ends in a more comfortable home for your family. Using energy more efficiently also reduces your consumption of fossil fuels, which helps protect the environment while lowering your heating costs. And, having great insulating material is a plus if the time comes to place your home on the market.

Visit the U.S. Department of Energy’s website to determine how much insulation you need based on where you live. Most homeowners need insulation using an R-value between 13 and 21 in their own kitchens, where many concrete walls are available.

Calculate inches of insulating material you want to realize your desired R-value. According to Energy Savers, fiberglass batts offer an R-value between 4 and 3 per inch, while rigid foam supplies an R-value between 4 and 8 per inch. By way of example, should you want to achieve R-13, you will need 3 to 4 inches of fundamental batt insulation, or as few as 2 inches of high quality foam board.

Construct a wood framework you can use to furr out the wall. Cut 2 by 4 lumber to the elevation of your concrete wall, without 1-1/2 inches to your header and footer. By way of example, if you have a 7-foot wall, you will want 6 foot 10-1/2 inch extended studs. Nail each stud into a 2 by 4 footer, with the studs spaced 24 inches apart, then attach a 2 by 4 header at the opposite end.

Stand framing wall up against the concrete and have a friend hold it in place. Drill holes in the framework and the concrete by means of a drill with a masonry bit. Add a concrete screw to each of these holes. Secure each stud at the top, middle and bottom utilizing concrete screws.

Cut your insulating material to fit between every wooden stud working with a utility knife.

Press each layer of insulation between the studs, making sure the insulation fits tightly to the sides of every stud so friction will hold the insulation in place. Do not compress the insulation tightly against the wall, as this lowers its effectiveness.

See related

The Way to Insert Circuit Breakers On Your House

These days people own more electronic equipment than as they find themselves connected to home entertainment systems, computers, video game consoles and mobile devices and chargers, in addition to each of the electronic equipment of years ago. If you end up running out of power capacity on your electrical circuits, you may want to add more circuits to serve your property. In addition to preparation and wiring the circuits themselves, you’ll need to join these circuits to circuit breakers on the key electrical service panel.

Assess your current capacity at the key electrical service panel. You need to see quite a few of 15-amp and 20-amp circuit breakers already installed. These protect your present circuits. In several cases there’ll be extra slots in which no breakers are installed. That is where any additional circuit breakers goes.

Assess the available power source at the main service panel. This amount is recorded in amps. Many service panels are configured to receive between 150 and 400 amps of current.

Add up the current ratings on each of the present circuit breakers. Compare this amount to the total available power source. When the available power is higher than the highest power of all circuits presently in use, then you can install one or more additional circuit breakers with no further ado. Contact your electric utility if there is no spare power left over, and ask it to supply you a much larger power source. Get permission from your landlord, if you are renting. Even with the landlord’s consent, raising the power source and expanding the major panel adds considerable time and expense to the project.

Buy as many circuit designs as you plan to install. Use 20-amp circuit breakers, because these enable fuller loads on a particular circuit. Only buy 15-amp breakers if you understand your new circuit will only have light total loads.

Wire your new circuit, including any sockets, switch boxes and junction boxes, prior to connecting it to the circuit breaker. Use 12-gauge electrical conduit using black-insulated hot cable, white-insulated neutral wire and bare or green-insulated floor cable. Depending upon your location, you may need to receive your wiring job inspected and approved by an electrician. It is a fantastic idea to do that anyway just to be sure of the integrity of your work.

Call and have your electrical utility cut the power for your main service panel.

Install the circuit breaker(s) to the support panel per the instructions supplied with the circuit breaker packing. Connect hot to warm, neutral to neutral and earth to earth, and confirm that all your connections are secure and correct.

Telephone the electrical utility to restore power.

Test the new circuit using a multimeter to be certain it is functioning properly. Do this before plugging any apparatus into the circuit.

See related

Can You Deduct Loan Origination Fees?

Your lender is not keeping score if he mentions point, or 1 percent of your loan amount. A stage can be categorized as an origination stage or discount stage. Origination points are paid by you directly to the mortgage originator for getting the funding. Borrowers pay discount points to the mortgage lender as prepaid interest to buy down the interest rate over the life span of their loan. Since the IRS believes points prepaid attention, the points are deductible on your federal income taxes–with terms of course. Not every debtor pays points on every loan.

Find which charges in your HUD-1 settlement statement are points. Not all of your closing costs are points. Find the origination points along with the discount points. The IRS does not classify any compensation fees aside from those as points. The HUD-1 settlement statement is required for all federally regulated mortgage loans. If your loan is not federally regulated, you received it from a private party rather than from a bank or financing institution, then your settlement statement might be on another form.

Ascertain if your points are deductible in precisely the exact same year you paid them, or if they have to be deducted over the life span of their loan. The IRS needs the loan be used to purchase or build a main residence. The settlement statement must clearly show the points as a proportion of your loan amount. Paying points have to be common to your own area, and the number of points can’t exceed the general amount charged in your area. You can’t alter the other closing costs such as title insurance and appraisals into stage just to write them off. You have to use the cash method of accounting and document a schedule A in your own tax returns. You have to have paid the things from your own funds at the time of closing; the loan can’t include funding the points into the loan. If all of them are true, you can deduct all of the points on the current year’s tax returns.

Deduct the points within the life span of the loan if you can’t fulfill all of the prerequisites to deduct them immediately. If your loan is for 30 years then you can deduct 1/30th of the points each year in your taxes. Typically you must deduct the points on a refinance loan over the life span of the loan unless a portion of the refinance proceeds are utilized to enhance the main residence.

See related

Not to Buy a Condo

A condo is a housing unit in a building where other houses may be beside, under and over one unit. Ownership of the property in the project, including the ground on which one unit sits, is owned by the collective whole of owners at a job. Condos have homeowner institutions that use the covenants, conditions and restrictions (CC&amp& amp;Rs).

Financing Issues

The Federal Housing Administration (FHA) insures mortgage loans for house buyers who purchase homes that they will occupy. Private lenders approve buyers, and the FHA issues an insurance policy which insures the lender repayment if the borrower defaults. Many buyers such as these loans since they have lower-down repayment requirements and can have lower rates of interest, since the loan is guaranteed by FHA. All detached houses under a specific pricing ceiling decided by a market by market basis are eligible for an FHA loan. The FHA's policies concerning condos changed in 2009. New or existing condo communities have to be accepted by the FHA before the FHA will consider insuring a loan for a buyer in that specific community. The most number of loans per condo job the FHA will ensure is 30 percent at any particular time, leaving 70 percent of all other buyers confronted with conventional financing or buying with cash.

Low Resale Possible

Historically, condos have sold more gradually than single-family houses since the demand for connected housing is lower than it is for detached homes. As stated by the RE Report, the days available in June 2010 for single-family houses was 59, although it had been 72 for connected houses, including condos.

Association prices

Association fees are a variable in condo projects. Some homeowner associations elect to raise the deductibles on their insurance coverages, and when a claim is made, the cost of the deductible is spread one of the owners, that might be in for an unexpected expense. If someone is hurt on the property and files that a huge claim or lawsuit, the employer 's association might need to satisfy the deductible, and the insurance company will pay the remainder. When the deductible on the master insurance coverage is $50,000, the taxpayers might need to pay their share of the allowable In an job with 100 units, each unit's owners would need to pay $5,000 each, unless their private homeowner's insurance coverage covers the master association's obligations.

Special Assessments

Condo institutions have the authority to increase the monthly association fees once the reserves are too low or the components require extensive exterior work to get a new roof or siding or other large capital improvements. The institutions have a legal right to need the money, and owners who don’t have it will have liens placed on their property. Owners are able to avoid having to pay large special assessments if they have an HO-6 insurance plan on their unit.

Pets

Most condo communities make it possible for pets, but they nearly always need to be under a specific weight. Buyers that have pets that won’t be accepted by the association might need to find new homes for them.

See related

How to Know Reverse Mortgages

Reverse mortgages have been touted as a method of turning the equity you’ve got in your home into earnings. Instead of making monthly mortgage payments, you can use the equity you’ve got in your home–the positive difference between the appraised value of your home and the mortgage in your home–to reverse the mortgage and get monthly payments rather. It appears a easy trade at very first sight, but before you take out a reverse mortgage on the home you’ve spent years paying , you should have a comprehensive comprehension of what a reverse mortgage involves.

Determine your eligibility to get a reverse mortgage. A reverse mortgage requires that all the name owners of your home be at least 62 years of age, and also that the home in question is their main residence. Only residential units qualify, with most qualifying homes being traditional single-family homes. Another eligibility requirement is that you talk to a mortgage adviser approved by the U.S. Department of Housing and Urban Development.

Apply to get a reverse mortgage using an FHA lender. Find lenders using the form on the HUD website.

Read the loan arrangement thoroughly. Note the terms of the loan, including the loan amount, payment plan and the rate of interest charged on the loan. Find the section detailing the fees for your loan as well. Lenders deduct the loan fees by the loan payment and charge interest on the fees as well.

Start looking for the section on home ownership inside the contract. This section of the contract describes your obligations regarding home care after completion of the loan process. Ordinarily, you will continue to pay land tax on the home, in addition to insurance and maintenance costs to keep the home in a level determined satisfactory by the FHA.

Pick the length of the loan along with the conditions for repayment. At the end of the loan period, you or your heirs are responsible for repaying the full loan amount including the money received, together with interest. Loan periods are either lien based, without a repayment because until you leave the home eternally; or duration based, where the loan includes a predetermined period of time till it is expected. You might also decide to make a line of credit reverse mortgage, setting a line of credit that you can draw on until you accomplish your loan limit.

Get accustomed to the default states of the loan that lead to a demand for repayment. The loan becomes due immediately if you are not able to keep up with real estate taxes or insurance, then proceed from the residence or fail to keep the home to FHA-mandated standards. Provided that you satisfy all of loan guidelines, you can keep residence in the home even after the term duration of the loan moves, regardless of repayment.

Speak to a mortgage adviser if you have any questions regarding the details of the loan, prior to signing the loan contract. Counseling is offered at a minimal cost or for free, based upon your income level.

See related

Neat Little Project: Construct a All-in-One Storage Seat

When building something for a kids’ area, think about it might be used by them. You and the recipient will find a lot more enjoyment and use out of something that can resist the transitions from one era to another. This multipurpose wooden seat can be used from childhood through the teen years as a small side table, nightstand, small seat and step stool, and as storage.

Chris Hill

This easy-to build piece measures 18 inches long, 91/4 inches deep and 143/4 inches high. It’s slightly shorter than a classic 18-inch-high seat plus somewhat taller than several step stools.

The bottom storage space measures 14 inches long, 73/4 inches wide and two1/2 inches deep. It can hold a variety of items, such as the books and large jar you see.

The top is large enough to hold a small lamp and other things.

Chris Hill

Tools

You’ll need a handsaw, miter saw or circular saw for cutting the parts, a pair of 18-inch or larger clamps plus a hammer.

When you have only a jigsaw, you can make the reductions for this undertaking, but be certain you’ve obtained a secured straightedge to utilize as a guide when doing so.

Materials 1-by-3-by-4 board 1-by-10-by-6 board 4d finish nails (28)For a painted version, use something such as poplar or alder. For a version that is stained, proceed with something such as walnut.

Pick up a box of 4d finish nails if you don’t have enough in your supplies already. It is possible to use #16 by 11/2-if you just happen to get those 18, inch brads.

You’ll also want some wood glue, primer and paint (or stain and polyurethane). And course paintbrushes and rags.

Chris Hill

Create the bottom (rail assembly). Cut 2 pieces of this 1-by-3 to 14 inches long — all these will be the railings. Cut a piece of this 1-by-10 to 14 inches long — this is the bottom. Apply glue to one edge of the railings and position them as shown at Figure 1 so they are flush with the edges of the bottom. Clamp everything in place and hammer four nails or brads through the ground and right into every railing.

Chris Hill

Attach the floor to the sides. Cut two pieces of 1-by-10 to 14 inches long — all these will be the sides. Apply glue to the ends of the bottom and railings, and position the meeting as shown at Figure 2, making certain the bottom is just 11/2 inches from the ends of the sides. Stir everything collectively and hammer five nails or brads through the sides and to the floor.

Chris Hill

Attach the top. Cut one final bit of this 1-by-10 to 18 inches long — this will be the top. Apply glue to the ends of the sides farthest from the bottom and position the top as shown at Figure 3. Clamp everything together and hammer five nails or brads through the top and right into every side.

Chris Hill

Add the finishing touches. Sand the entire piece, particularly any demanding corners and borders. If you are planning to paint it, then apply two coats of primer. Sand between coats after the primer has dried. Apply two coats of paint.

If you’ll be staining the bit rather, apply blot for the desired time, wipe off the excess and allow the piece to dry prior to applying a top coat of polyurethane. You can even mimic a blot with a DIY colour wash.

Gently rub on the very first dry coating of foam with fine-grit sandpaper (220) or steel wool, and wipe off any residue prior to applying any succeeding coats.

More: Browse more DIYs

See related

Get the Appearance of a Constructed Fridge for Less

Counter-depth refrigerators are popular appliances for new kitchens. Their allure is they save precious aisle space by sitting flush with the cabinets rather than sticking out. This makes the kitchen look smooth, custom and visually arranged. These models may also be finished with matching cabinet doors for a much more cohesive look.

The downside is they’re very pricey. They can cost two to three times greater than a normal freestanding fridge, and have to be wider to incorporate exactly the exact same cubic-foot storage. If you’d like this look with no excess cost, design your cabinets and kitchen in order that your regular-size fridge sits flush with your cabinets.

Cameo Kitchens, Inc..

Freestanding refrigerators are available in many shapes and sizes. While typical foundation and tall cabinets are 24 inches deep, freestanding refrigerators may be 30 inches deep or deep, with varying widths too. Therefore, you should select your fridge early in the preparation procedure.

To get that flush look, you may either recess a freestanding unit several inches into a wall or have your cabinets furred out a couple inches to fulfill with the refrigerator.

Inside this kitchen, even if you look carefully, you’ll see that the 24-inch-deep base cabinets that extend into the left are brightly behind the oven cabinets. The appliance portion of this wall, hence, was furred out. Be aware that the side cabinet panel on the right was arranged in a larger size to accommodate the depth of the fridge, which can be more than 24 inches.

Design Details

In this case the fridge door sticks out beyond the bottom cabinets. However, because there are deep side panels and a profound cabinet overhead, the fridge looks integrated into the cabinetry and constructed in. A profound cabinet over the fridge is a good location for tray storage or maybe a TV, as revealed here.

Boor Bridges Architecture

Here is another kitchen where deeper cabinets adapt the larger depth of a freestanding device. This fridge is a bottom-freezer model.

microhouse

Here the homeowners assembled a broader set of deep cabinets, which include some spacious shelves for display.

Buckminster Green LLC

Another method to “build in” your freestanding fridge is to really build it into the wall, rather than cabinets. If your kitchen program will allow it, this is probably the easiest and most cost-effective approach to get the look, since you may create the opening the exact width and depth you need. Additionally you won’t have some cabinet modification costs.

Margeaux Interiors – Margaret Skinner

This is particularly well done. The very linear fridge fits neatly into the opening and can be trimmed out with home molding. The display shelf above draws the eye upward. With a wine refrigerator next to the major refrigerator in a little peninsula cabinet, this is a good area for dispensing beverages.

Kate Marker Interiors

This kitchen utilizes a very productive approach to incorporate a profound fridge: The cabinets have been stepped, for a very custom look. In the corner to the left of the fridge, the cabinets are typical sizes: 12 inches deep on top; 24 inches deep on the bottom. Next comes the upper cabinets and the appliance garage device, probably 15 to 18 inches deep. The deepest cabinet is about the fridge, with display cabinets above.

At the end is a tall spacious cabinet that creates an interesting visual display as you enters the kitchen. Be aware that this cabinet is really pulled back a couple of inches in the fridge depth, so it proceeds the stepped look and also makes that corner a little less intrusive.

Susan Teare, Professional Photographer

Cabinets and a fridge sandwiched in stud walls produce a clean and contemporary look here. The cabinets were likely furred out over the walls.

Rebekah Zaveloff | KitchenLab

This fridge is the centerpiece of an open display area. This would be a very cost-effective method to house a fridge and small appliances while using a brief wall. (This therapy even accommodates a radiator)

More:
4 Essential Space-Planning Considerations

How to Stay Cool About Selecting the Right Refrigerator

See related

Newly Open Style Updates That a Contemporary Atlanta Home

Town to town, up and down the dial … Janice and Greg Raab’s professions in radio meant a lot of moves — 14 homes in all as 1983, including in Pittsburgh, Detroit, Chicago, Dallas, San Francisco and Atlanta. The couple has adopted these relocation chances and fallen in love by taking on the challenges of fixer-uppers. Both have the keen eye to see beyond bad cosmetics to a home’s possible, and they do as much of the job as they can themselves.

And here’s a novelty: They prefer to cover as they proceed. Yes, all these are patient folks who save up for each home endeavor without going into debt. After residing in a traditional home in San Francisco, they fell in love with this modern 1980s home in Atlanta and worked on living room by room as money and time allowed for seven years. The kitchen was Janice’s favorite renovation narrative, so we’ll concentrate on that.

at a Glance
Who resides: Janice and Greg Raab
Location: Atlanta
Size: 5,000 square feet; 5 bedrooms, 3 1/2 bathrooms

The home comes with a natural style, with fieldstone, wood and a palette of grays, browns and tans infusing it with a warm look. That aesthetic was kept by the Raabs throughout the renovations in your mind.

The few balanced saving initial attributes and removing those that weren’t working. The fieldstone fireplace, cedar ceiling and black tile floor are first.

“When we moved, the black tile covered the whole first floor and made things really dim,” Janice Raab states. “We thought really hard about how much of it save and how much of it replace with bamboo floors, which lightens up the space”

Raab is also huge fan of George Nelson pendant lighting, and she was thrilled that they worked well with the scale and style of the house. She put a number of them put throughout the first floor.

Before Photo

BEFORE: The first kitchen was outdated, dark and cramped, and it wasn’t a welcoming hangout. The couple commissioned their dear friend, Reed Ericson of Studio R Squared, for design help.

“It had been fantastic to use such a good friend, because we could take as long as we desired and fully change our minds about things, and he just rolled with it,” Raab says.

AFTER: walnut floors, travertine backsplash tiles, amber pendant lighting and an onyx waterfall countertop add organic warmth to the modern, clean-lined kitchen. The cabinet grain runs.

The Raabs balanced splurges and savings throughout the renovation. For example, they splurged on onyx and LEM Piston pub stools, and saved by using an induction scope that did not need an expensive gas line.

They weren’t content with the way the slender hardware seemed with the refrigerator’s heft, thus a helpful oven installer finagled two extra oven handles out of GE to utilize for the fridge, which were a far better match.

Stools: LEM Piston Bar Stools, Design Within Reach; pendant lighting: LBL Cypree Pendant; countertops: walnut, Silestone; cabinets: custom, walnut with wenge stain, Cabico; all appliances: GE Monogram

Sink: Kohler Stage Sink with Integrated Cutting Board and Prep Bowls

A pub replaced an awkward old media desk off the kitchen. The few saved a portion of the house’s original dark tiles, offering a connection between the kitchen and the dining room.

This dining room inside the large, open living room is right off the kitchen. The waterfall counter around the buffet/bookshelf emulates the waterfall at the kitchen. It is crafted of the same cabinet oak using all the wenge stain and onyx counter tops.

The pair travels light, plus they prefer to groom their homes to match varied fashions. The burled ash dining table is one piece that the couple has taken with them over the years from house to house (along with Greg’s beloved vinyl collection — beyond that, there are not many exceptions).

Pendant light: George Nelson Ball Lamp, Design Within Reach; buffet: custom using Cabico cabinets, oak with wenge stain

Studio R Squared designed each the cabinetry, including this huge unit that divides the staircase connecting the dining room and living room.

The inspiration for the massive cabinet came out of a Modern Atlanta home tour. “I had seen a piece like this place on staircase throughout the tour a few years ago and snapped a photo of it,” Raab says.

Just beyond the dining room is the top deck, finish with an option for dining outside. This really is a wrought deck that extends across the whole back of the house. The decks are very private; throughout the seasons once the leaves are filled in, there’s not another house in sight.

One of the first things that the couple did was add fresh stainless steel cable railings on the two decks and the front walkway.

Raab scored the outdoor furniture through Craigslist. The initial set cost approximately $1,200 retail, however she bought all these pieces for $600.

Because of career changes, the couple needed to leave their labor of love only after finishing it, and are not certain of where they’ll land next. While they are unhappy to leave, they look forward to finding another diamond in the rough and slowly but surely bringing it up to its entire potential.

More: See the rest of this Home

See related